Active Data Guard - 12c (enhanced features)
Active Data Guard is an Oracle Database Enterprise Edition option. It includes all of the Data Guard functionality described to this point, as well as the following capabilities: Real-Time Query – Performance and ROI
Automatic Block Repair – High Availability
Far Sync - Zero Data Loss Protection at any Distance: Active Data Guard Far Sync, a new capability for Oracle Database 12, eliminates compromise by extending zero data loss protection to any standby database located at any distance from a primary database, and doing so at minimal expense and without additional complexity.
Database Rolling Upgrades using Active Data Guard: Database Rolling Upgrades using Active Data Guard, a new capability for Oracle Database 12, addresses concerns for complexity by replacing forty-plus manual steps required to perform a transient logical rolling upgrade with three PL/SQL packages that automate much of the process.
Application Continuity - Application Continuity is a new application-independent capability for Oracle Database 12that recovers incomplete requests from an application perspective and masks many system, communication, and hardware failures, and storage outages from the end-user. It also ensures that end-user transactions are executed no more than once.
Global Data Services - Oracle Global Data Services (GDS) is a new capability for Oracle Database 12that extends familiar RAC-style connect-time and run-time load balancing, service failover and workload management capabilities to a collection of replicated databases, be it within a single datacenter or across multiple datacenters.
Thursday, July 11, 2013
Thursday, June 20, 2013
BI Apps with DI products (ODI & GG)
ODI
Oracle BI Applications leverages the advantages of Oracle Data Integrator Enterprise Edition (ODI)
ODI helps to integrate data end-to-end across the full BI Applications architecture, supporting capabilities such as data-lineage which helps business users identify report-to-source capabilities. And while Oracle has re-architectured the solution to use ODI, major concepts still remain the same. For example, mappings and the data warehouse still supports multiple sources, full and incremental loads, slowly changing dimensions, and can be customized.
GG
Customers can choose the option to replicate their data in real-time using Oracle GoldenGate.
There are five key elements that differentiate Oracle Data Integration from other data integration offerings and make it the logical strategic choice as the foundation for Oracle BI Applications:
1. Completeness: Real-time, Bulk data movement, transformation, DQ, data federation
2. Best in class performance, availability, and reliability. - EL-T architecture
3. Fast time to value - Declarative Design
4. Open and standards-based
5. Low total cost of ownership, no midtier apps server, can scale with DW
Oracle BI Applications are optimized to work especially with two Oracle Engineered Systems. Exalytics and the Exadata Database Machine. Especially for Exadata, where there’s an even greater advantage for using Oracle Data Integration products with Oracle BI Applications.
New Oracle Data Integration: BI Apps are completely re-architected to leverage Oracle Data Integrator and Oracle GoldenGate.
· BI Applications is now available with next-generation Data Integration. Oracle Data Integrator (ODI) delivers unique next-generation, Extract Load and Transform (E-LT) technology that improves performance and reduces data integration costs—even across heterogeneous systems, and improves productivity.
· Functional Setup Manager provides a Web based Administrative User Interface to track and manage implementation projects and their required functional setup steps
· Configuration Manager provides a centralized Web based administrative user interface to simplify the setup and maintenance of Oracle Business Intelligence Applications.
· A new optional pre-packaged solution, that leverages GoldenGate, eliminates the need for an ETL batch window and minimizes the impact on OLTP systems, while providing near real-time reporting and enabling more reliable change data capture and delete support.
· Customers may continue alternatively to use Oracle BI Apps 7.9.6.x and Informatica ETL.
Tuesday, May 28, 2013
Check which tables have supplemental log groups
Tables that have supplemental logs:
SELECT
OWNER,
LOG_GROUP_NAME,
TABLE_NAME,
DECODE(ALWAYS,
'ALWAYS', 'Unconditional',
'CONDITIONAL', 'Conditional') ALWAYS,
LOG_GROUP_TYPE
FROM DBA_LOG_GROUPS;
OR tables by schema, that do not have supplemental log groups:
Tables by schema that do not have supplemental log groups:
where owner = 'SCHEMA_NAME' and table_name not in
(SELECT
TABLE_NAME FROM DBA_LOG_GROUPS)
order by table_name;
Thursday, April 11, 2013
Scripts that are run at Linux Startup and Shell login
FOR LINUX:
Sometimes when you go into a shell, there are certain env variables that may be already set. Or you may want to run something at boot or when you login to a new shell.
There are several places to put those commands:
At bootup:
/etc/rc.d/rc.local
/etc/rc.d/init.d/ - this file is execute for the user
At login (in this order) - these are in the $HOME dir of the user:
/home/oracle/.bashrc
/home/oracle/.bash_profile
/home/oracle/.bach_login
(also check if these files call another file, like /etc/bashrc or /etc/profile)
Sometimes when you go into a shell, there are certain env variables that may be already set. Or you may want to run something at boot or when you login to a new shell.
There are several places to put those commands:
At bootup:
/etc/rc.d/rc.local
/etc/rc.d/init.d/
At login (in this order) - these are in the $HOME dir of the user:
/home/oracle/.bashrc
/home/oracle/.bash_profile
/home/oracle/.bach_login
(also check if these files call another file, like /etc/bashrc or /etc/profile)
Wednesday, April 10, 2013
DBMS_REDEFINITION & GG
There is some confusion if dbms_redefinition can be used on a database where GoldenGate is configured.
First, let's see what online Table Redefinition can be used for:
Move EMP table to EMP_PARTITIONED_TEMP table
Here are the very high-level steps of online redefinition:
1) Create an interim table: CTAS EMP as EMP_PARTITIONED_TEMP (partitioned)
If GG DDL replication is enabled, then the interim table will also get replicated and created in the target.
2) Start redefinition - During this phase Oracle will copy (and partition) the data from the EMP to the EMP_PARTITIONED_TEMP. Oracle will also create a materialized view (snapshot) log on the table to track DML changes
At this point EMP's ObjID is 101 & EMP_PARTITIONED_TEMP's ObjID is 201
GG does not replicate any DDL executed by the dbms_redefinition pkg - so there is no mv snapshot taken on the target
The DML for both tables is replicated to the target (but this will be useless at the end)
3) Finish redefinition - During this step Oracle will lock both tables in exclusive mode, swap the names of the two tables in the data dictionary, and enable all foreign key constraints
In this step, Oracle swaps the ObjIDs of the 2 tables, so EMP becomes 201, and EMP_PARTITIONED_TEMP becomes 101.
GG does not replicate any DDL executed by the dbms_redefinition pkg - so the swap of the ObjIDs is not replicated to the target
4) Remember to drop the original table afterwards. One can also consider renaming the constraints back to their original names (e.g.: alter table EMP rename constraint SYS_C001806 to emp_fk).
When the interim table is dropped, the 'drop table' is replicated to the target. But since the ObjIDs were not replicated to the target, the interim table is dropped. There was no affect of the redefinition on the target
First, let's see what online Table Redefinition can be used for:
- Add, remove, or rename columns from a table
- Converting a non-partitioned table to a partitioned table and vice versa
- Switching a heap table to an index organized and vice versa
- Modifying storage parameters
- Adding or removing parallel support
- Reorganize (defragmenting) a table
- Transform data in a table
Move EMP table to EMP_PARTITIONED_TEMP table
Here are the very high-level steps of online redefinition:
1) Create an interim table: CTAS EMP as EMP_PARTITIONED_TEMP (partitioned)
If GG DDL replication is enabled, then the interim table will also get replicated and created in the target.
2) Start redefinition - During this phase Oracle will copy (and partition) the data from the EMP to the EMP_PARTITIONED_TEMP. Oracle will also create a materialized view (snapshot) log on the table to track DML changes
At this point EMP's ObjID is 101 & EMP_PARTITIONED_TEMP's ObjID is 201
GG does not replicate any DDL executed by the dbms_redefinition pkg - so there is no mv snapshot taken on the target
The DML for both tables is replicated to the target (but this will be useless at the end)
3) Finish redefinition - During this step Oracle will lock both tables in exclusive mode, swap the names of the two tables in the data dictionary, and enable all foreign key constraints
In this step, Oracle swaps the ObjIDs of the 2 tables, so EMP becomes 201, and EMP_PARTITIONED_TEMP becomes 101.
GG does not replicate any DDL executed by the dbms_redefinition pkg - so the swap of the ObjIDs is not replicated to the target
4) Remember to drop the original table afterwards. One can also consider renaming the constraints back to their original names (e.g.: alter table EMP rename constraint SYS_C001806 to emp_fk).
When the interim table is dropped, the 'drop table' is replicated to the target. But since the ObjIDs were not replicated to the target, the interim table is dropped. There was no affect of the redefinition on the target
Shared Folders on VBox
To share a folder between the host and the guest in VBox...
1. Go to Settings/Devices > Shared Folders > Add a new Machine Folder

(Recommended) If you would like to auto-mount this shared folder, click on Auto-mount and Make Permanent

2. At this point restart the VM for the shared folder to get auto-mounted:
[oracle@localhost ~]$ df -k
Filesystem 1K-blocks Used Available Use% Mounted on
/dev/hda1 10504124 2387488 7574444 24% /
/dev/hdb1 12184796 7522868 4032988 66% /home
tmpfs 1815936 290720 1525216 17% /dev/shm
/dev/mapper/vg00-apps--fs
9805144 153084 9153988 2% /u01
Shared_VM_ODI12c 224776188 147399704 77376484 66% /media/sf_Shared_VM_ODI12c
3. On the Guest, login as root, and add 'oracle' user to the vboxsf group so that the user has access to the shared file system:
root# /usr/sbin/usermod -G vboxsf -a oracle
4. Now restart the VM to inherit the vboxsf group privs, and you should be able to cd into the shared folder:
[oracle@localhost sf_temp_share]$ id
uid=500(oracle) gid=500(oracle) groups=500(oracle),54323(davfs2),54324(vboxsf)
THERE IS NO NEED TO DO 'mount -t vboxsf shared_folder /shared_folder' -since we auto-mounted the file system.
Flashback & GoldenGate
Goldengate supports the flashback of committed transactions, but does not support flashback at the database or dropped table levels.
Supported
flashback table ... to SCN ...
flashback table ... to TIMESTAMP ...
flashback table ... to RESTORE POINT ...
Not Supported
flashback table ... to BEFORE DROP ...
flashback DATABASE ... to ...
Quick test with flashback table:
Pre-requisites: set these parameters:
;
sql> alter table schema.table enable row movement;
Use any table to do this test:
1) Get the current SCN#:
sql> SELECT current_scn FROM v$database;
CURRENT_SCN
-----------
15286586
1 row selected.
2) Make some DML changes to the test table
3) sql> SELECT current_scn FROM v$database;
CURRENT_SCN
-----------
15286648
1 row selected.
4) Flashback test table to before the latest changes:
sql> flashback table emp to scn 15286586;
Flashback complete.
Select from the test table, confirm that the table has been flashed back
Now check on the target; GG replicated the changes made with the flashback table command - tables should be in sync
5) Now flashback again to after the latest changes:
sql> flashback table emp to scn 15286648;
Flashback complete.
Source table should be restored to after the changes; and GG should have also replicated the changes.
Supported
flashback table ... to SCN ...
flashback table ... to TIMESTAMP ...
flashback table ... to RESTORE POINT ...
Not Supported
flashback table ... to BEFORE DROP ...
flashback DATABASE ... to ...
Quick test with flashback table:
Pre-requisites: set these parameters:
- db_flashback_retention_target
- db_recovery_file_dest
- db_recovery_file_dest_size
sql> alter table schema.table enable row movement;
Use any table to do this test:
1) Get the current SCN#:
sql> SELECT current_scn FROM v$database;
CURRENT_SCN
-----------
15286586
1 row selected.
2) Make some DML changes to the test table
3) sql> SELECT current_scn FROM v$database;
CURRENT_SCN
-----------
15286648
1 row selected.
4) Flashback test table to before the latest changes:
sql> flashback table emp to scn 15286586;
Flashback complete.
Select from the test table, confirm that the table has been flashed back
Now check on the target; GG replicated the changes made with the flashback table command - tables should be in sync
5) Now flashback again to after the latest changes:
sql> flashback table emp to scn 15286648;
Flashback complete.
Source table should be restored to after the changes; and GG should have also replicated the changes.
Enable Archivelog mode - in Oracle DB
CONN / AS SYSDBA
ALTER SYSTEM SET log_archive_dest_1='location=d:\oracle\oradata\DB10G\archive\' SCOPE=SPFILE;
ALTER SYSTEM SET log_archive_format='ARC%S_%R.%T' SCOPE=SPFILE;
SHUTDOWN IMMEDIATE
STARTUP MOUNT
ALTER DATABASE ARCHIVELOG;
ALTER DATABASE OPEN;
ALTER SYSTEM SET log_archive_format='ARC%S_%R.%T' SCOPE=SPFILE;
SHUTDOWN IMMEDIATE
STARTUP MOUNT
ALTER DATABASE ARCHIVELOG;
ALTER DATABASE OPEN;
Add a new file system/mount point in linux (in a VBox VM)
This post is about how to add a file system in a linux guest running on VBox (or any Linux host)
1. Stop the Guest, and add the hard disk to the VBox image, under Settings > Storage > Controller


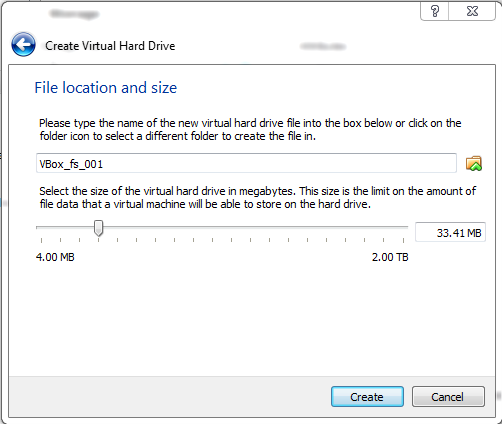
2. Then start the VM, login as root and confirm that the device is listed under fdisk -l
[root@localhost ~]# fdisk -l
Disk /dev/hda: 12.8 GB, 12884901888 bytes
255 heads, 63 sectors/track, 1566 cylinders
Units = cylinders of 16065 * 512 = 8225280 bytes
Device Boot Start End Blocks Id System
/dev/hda1 * 1 1350 10843843+ 83 Linux
/dev/hda2 1351 1566 1735020 82 Linux swap / Solaris
Disk /dev/hdb: 12.8 GB, 12884901888 bytes
255 heads, 63 sectors/track, 1566 cylinders
Units = cylinders of 16065 * 512 = 8225280 bytes
Device Boot Start End Blocks Id System
/dev/hdb1 * 1 1566 12578863+ 83 Linux
Disk /dev/hdd: 10.7 GB, 10737418240 bytes
16 heads, 63 sectors/track, 20805 cylinders
Units = cylinders of 1008 * 512 = 516096 bytes
Disk /dev/hdd doesn't contain a valid partition table
3. Create the physical volume with pvcreate:
[root@localhost ~]# pvcreate /dev/hdd Physical volume "/dev/hdd" successfully created
4. Create a volume group vg00 with vgcreate:
[root@localhost ~]# vgcreate vg00 /dev/hdd
Volume group "vg00" successfully created
5. Create a logical volume with lvcreate:
[root@localhost ~]# lvcreate -L 9.5g -n apps-fs vg00
Logical volume "apps-fs" created
6. Now review with pvs, vgs, lvs:
[root@localhost ~]# pvs
PV VG Fmt Attr PSize PFree
/dev/hdd vg00 lvm2 a- 10.00G 10.00G
[root@localhost ~]# vgs
VG #PV #LV #SN Attr VSize VFree
vg00 1 0 0 wz--n- 10.00G 10.00G
[root@localhost ~]# lvs
LV VG Attr LSize Origin Snap% Move Log Copy% Convert
apps-fs vg00 -wi-a- 9.50G
7. Now make a file system with mkfs...
[root@localhost ~]# mkfs.ext3 /dev/vg00/apps-fs
mke2fs 1.39 (29-May-2006)
Filesystem label=
OS type: Linux
Block size=4096 (log=2)
Fragment size=4096 (log=2)
1245184 inodes, 2490368 blocks
124518 blocks (5.00%) reserved for the super user
First data block=0
Maximum filesystem blocks=2550136832
76 block groups
32768 blocks per group, 32768 fragments per group
16384 inodes per group
Superblock backups stored on blocks:
32768, 98304, 163840, 229376, 294912, 819200, 884736, 1605632
Writing inode tables: done
Creating journal (32768 blocks): done
Writing superblocks and filesystem accounting information: done
This filesystem will be automatically checked every 25 mounts or
180 days, whichever comes first. Use tune2fs -c or -i to override.
8. Then create a directory to attach the file system:
[root@localhost /]# mkdir -m 755 /u01
[root@localhost /]# ls -ld /u01
drwxr-xr-x 2 root root 4096 Apr 10 10:38 /u01
9. Now add an entry in /etc/fstab to auto-mount the new file system at reboot:
[root@localhost /]# vi /etc/fstab
[root@localhost /]# cat /etc/fstab
LABEL=/ / ext3 defaults 1 1
LABEL=/home /home ext3 defaults 1 2
...
/dev/vg00/app-fs /u01 ext3 defaults,usrquota 0 2
10. Test to make sure there are no errors in the /etc/fstab file with "mount -a". If there is no output, then there are no errors:
[root@localhost /]# mount -a
[root@localhost /]#
[root@localhost /]# df -h
Filesystem Size Used Avail Use% Mounted on
/dev/hda1 11G 2.3G 7.3G 24% /
/dev/hdb1 12G 7.2G 3.9G 66% /home
tmpfs 1.8G 284M 1.5G 17% /dev/shm
Shared_VM_ODI12c 215G 141G 74G 66% /media/sf_Shared_VM_ODI12c
/dev/mapper/vg00-apps--fs 9.4G 150M 8.8G 2% /u01
1. Stop the Guest, and add the hard disk to the VBox image, under Settings > Storage > Controller
2. Then start the VM, login as root and confirm that the device is listed under fdisk -l
[root@localhost ~]# fdisk -l
Disk /dev/hda: 12.8 GB, 12884901888 bytes
255 heads, 63 sectors/track, 1566 cylinders
Units = cylinders of 16065 * 512 = 8225280 bytes
Device Boot Start End Blocks Id System
/dev/hda1 * 1 1350 10843843+ 83 Linux
/dev/hda2 1351 1566 1735020 82 Linux swap / Solaris
Disk /dev/hdb: 12.8 GB, 12884901888 bytes
255 heads, 63 sectors/track, 1566 cylinders
Units = cylinders of 16065 * 512 = 8225280 bytes
Device Boot Start End Blocks Id System
/dev/hdb1 * 1 1566 12578863+ 83 Linux
Disk /dev/hdd: 10.7 GB, 10737418240 bytes
16 heads, 63 sectors/track, 20805 cylinders
Units = cylinders of 1008 * 512 = 516096 bytes
Disk /dev/hdd doesn't contain a valid partition table
3. Create the physical volume with pvcreate:
[root@localhost ~]# pvcreate /dev/hdd Physical volume "/dev/hdd" successfully created
4. Create a volume group vg00 with vgcreate:
[root@localhost ~]# vgcreate vg00 /dev/hdd
Volume group "vg00" successfully created
5. Create a logical volume with lvcreate:
[root@localhost ~]# lvcreate -L 9.5g -n apps-fs vg00
Logical volume "apps-fs" created
6. Now review with pvs, vgs, lvs:
[root@localhost ~]# pvs
PV VG Fmt Attr PSize PFree
/dev/hdd vg00 lvm2 a- 10.00G 10.00G
[root@localhost ~]# vgs
VG #PV #LV #SN Attr VSize VFree
vg00 1 0 0 wz--n- 10.00G 10.00G
[root@localhost ~]# lvs
LV VG Attr LSize Origin Snap% Move Log Copy% Convert
apps-fs vg00 -wi-a- 9.50G
7. Now make a file system with mkfs...
[root@localhost ~]# mkfs.ext3 /dev/vg00/apps-fs
mke2fs 1.39 (29-May-2006)
Filesystem label=
OS type: Linux
Block size=4096 (log=2)
Fragment size=4096 (log=2)
1245184 inodes, 2490368 blocks
124518 blocks (5.00%) reserved for the super user
First data block=0
Maximum filesystem blocks=2550136832
76 block groups
32768 blocks per group, 32768 fragments per group
16384 inodes per group
Superblock backups stored on blocks:
32768, 98304, 163840, 229376, 294912, 819200, 884736, 1605632
Writing inode tables: done
Creating journal (32768 blocks): done
Writing superblocks and filesystem accounting information: done
This filesystem will be automatically checked every 25 mounts or
180 days, whichever comes first. Use tune2fs -c or -i to override.
8. Then create a directory to attach the file system:
[root@localhost /]# mkdir -m 755 /u01
[root@localhost /]# ls -ld /u01
drwxr-xr-x 2 root root 4096 Apr 10 10:38 /u01
9. Now add an entry in /etc/fstab to auto-mount the new file system at reboot:
[root@localhost /]# vi /etc/fstab
[root@localhost /]# cat /etc/fstab
LABEL=/ / ext3 defaults 1 1
LABEL=/home /home ext3 defaults 1 2
...
/dev/vg00/app-fs /u01 ext3 defaults,usrquota 0 2
10. Test to make sure there are no errors in the /etc/fstab file with "mount -a". If there is no output, then there are no errors:
[root@localhost /]# mount -a
[root@localhost /]#
[root@localhost /]# df -h
Filesystem Size Used Avail Use% Mounted on
/dev/hda1 11G 2.3G 7.3G 24% /
/dev/hdb1 12G 7.2G 3.9G 66% /home
tmpfs 1.8G 284M 1.5G 17% /dev/shm
Shared_VM_ODI12c 215G 141G 74G 66% /media/sf_Shared_VM_ODI12c
/dev/mapper/vg00-apps--fs 9.4G 150M 8.8G 2% /u01
Subscribe to:
Posts (Atom)